Tell The World About Your Group!
 Several pages of your group's web site will be available to the general public without logging on:
- Home
- About Us
- Our Leaders
- Download Forms
- Photo Gallery
- Video Gallery
Your Home page should introduce your group to the viewer, who could be a member of your group, a potential new member, or just an interested person in your community.
Members of your group may appreciate some guidance on how to use the site. Persons interested in joining your group will want to know when and where you meet and who to contact for more information.
Consider this audience when you plan your home page.
The About Us page should go into more details about your organization: your goals, philosophy, history, and types of activities.
You can create additional Custom Pages that you can edit in the same way that you edit the Home and About Us pages.
The Our Leaders page will be automatically constructed using the information you enter into your database about your leaders, including the photos they upload on their contact information pages.
Similarly, the Download Forms page will list those forms and documents that you have authorized to be available to the general public.
The Photo Gallery will display a list of past events for which you've uploaded photos.
The Video Gallery will display a list of past events for which you've uploaded videos.
These last two pages can be removed from public viewing by following the instructions in the Control Public Access page of this User Guide.
Home Page Layout
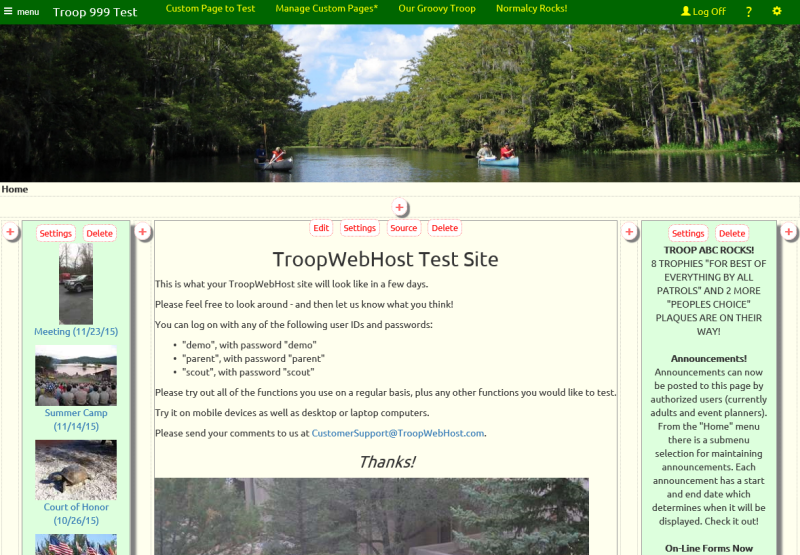
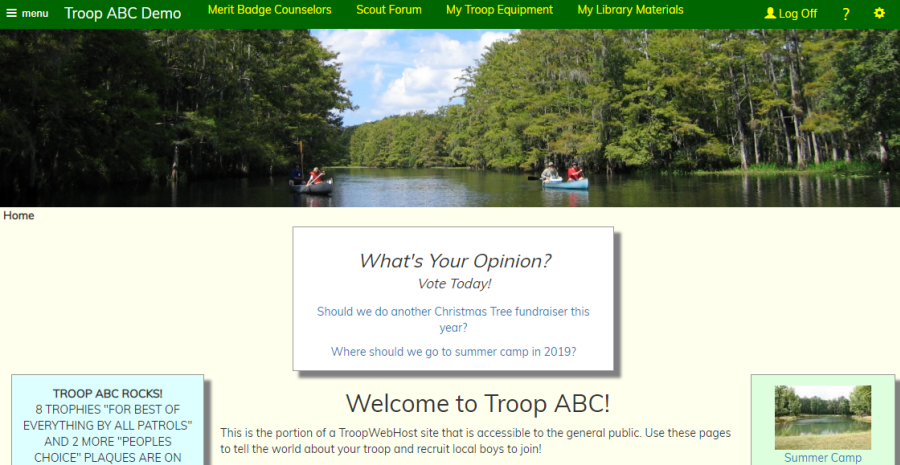
The first time you visit your site the home page will look like this:
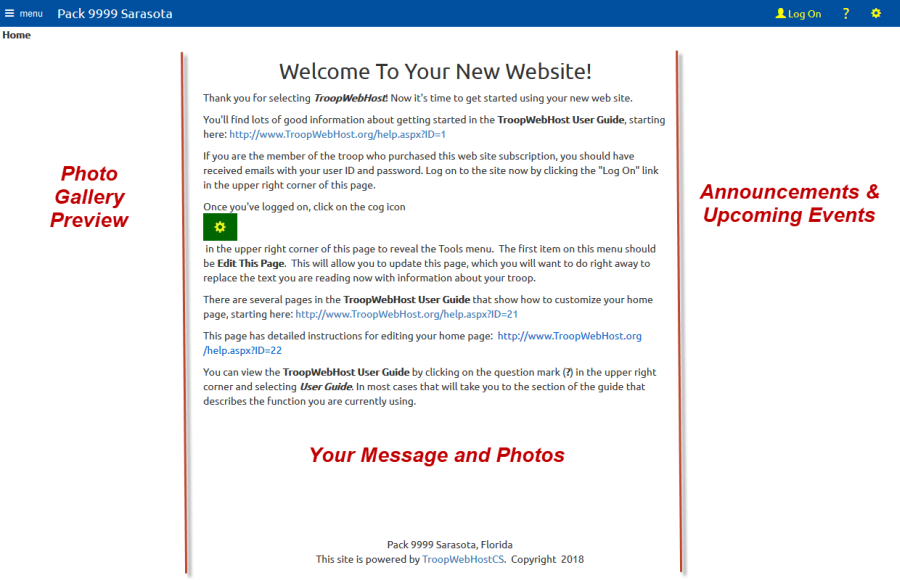
The Photo Gallery Preview column on the left is empty now, but it will be automatically populated with the first photo from the six most recent events for which you've loaded photos into your Photo Gallery.
The Announcements & Upcoming Events column on the right is also empty, but it will be automatically populated with current Announcements and a summary of the next twelve events on your calendar.
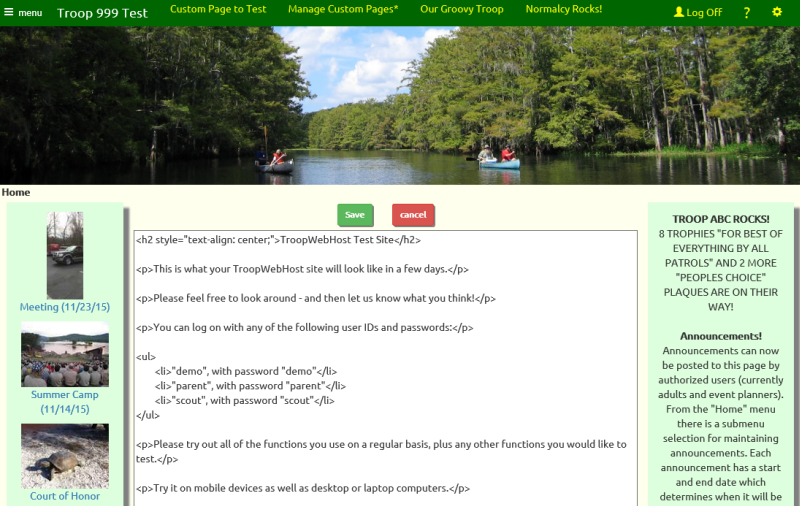
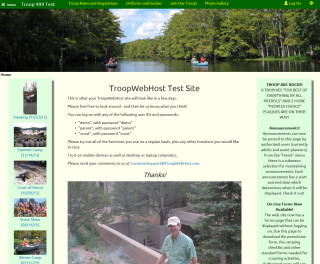
You will replace the center portion of the page with your text and photos by Editing Your Home Page.
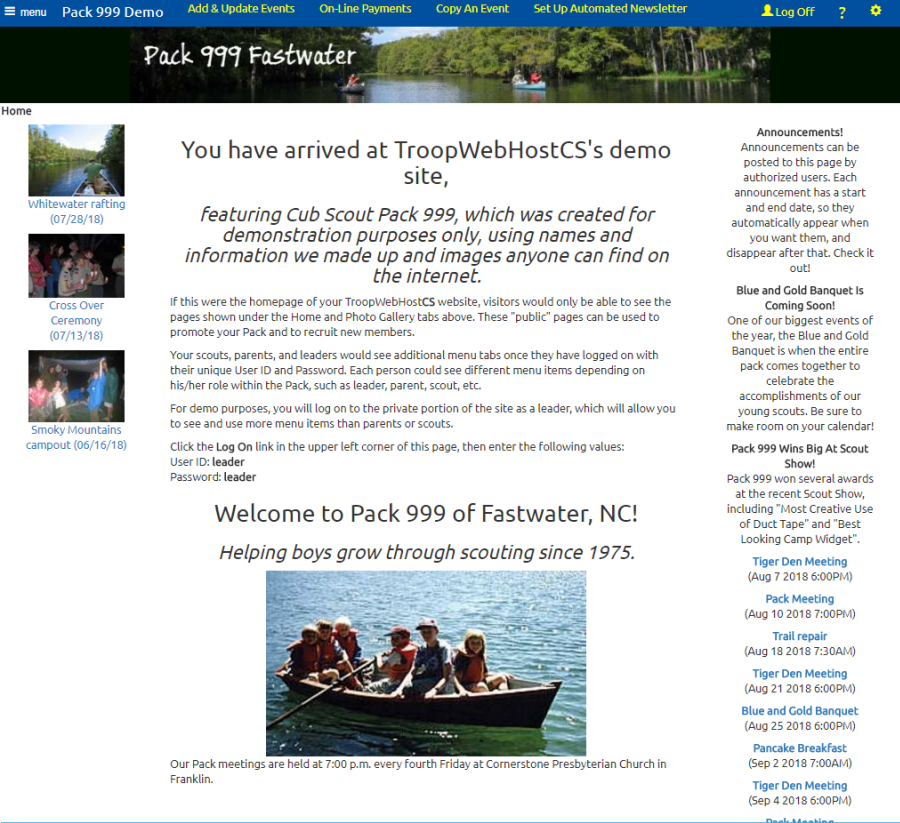
Soon it will look more like this:
Editing Your Home Page
You must log on to the site before you can start editing your home page. Only those users assigned to the User Role of Web Page Editor are allowed to edit the home page.
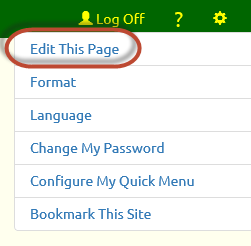 After logging on to the site, stay on the home page and click the
  icon in the upper right
corner of the page to reveal the Tools menu, as shown at right.
icon in the upper right
corner of the page to reveal the Tools menu, as shown at right.
If you are on the home page - or any other page that you can edit - you'll see "Edit This Page" at the top of the Tools menu. Select that option to begin editing the current page.
Once you are done editing the page, go back to the Tools menu. The top item will now be "Exit Page Edit".
Page Sections
When you enter edit mode, you'll see the page divided into sections, as shown above.
There are two types of sections:
- Those containing text and images that you create.
- "Widgets" that display information from your troop's database.
The first type of section will have four buttons at the top:
- "Edit" will open the WYSIWYG editor for this section.
- "Settings" will let you change the width, background color and other parameters for this section.
- "Source" will allow you to edit the HTML source code for this section.
- "Delete" will delete this section permanently.
Widgets only have two buttons: "Settings" and "Delete".
The ![]() buttons that you see scattered about the page will create a new section
in that location.
buttons that you see scattered about the page will create a new section
in that location.
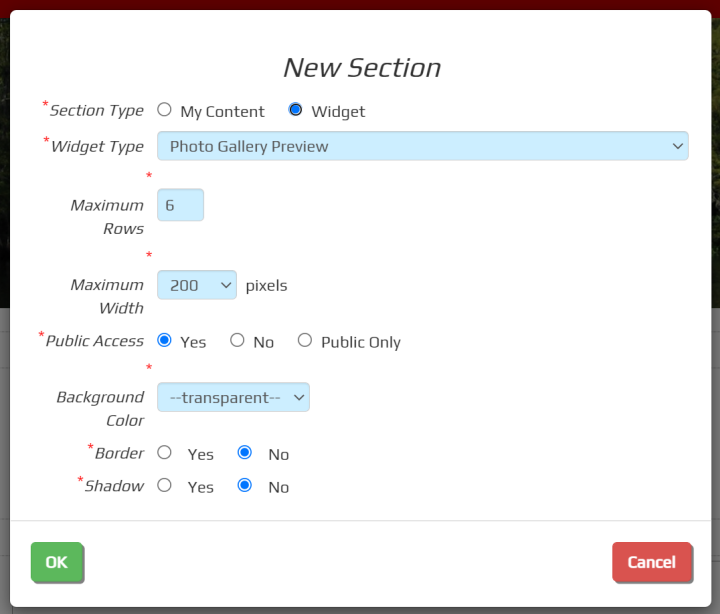
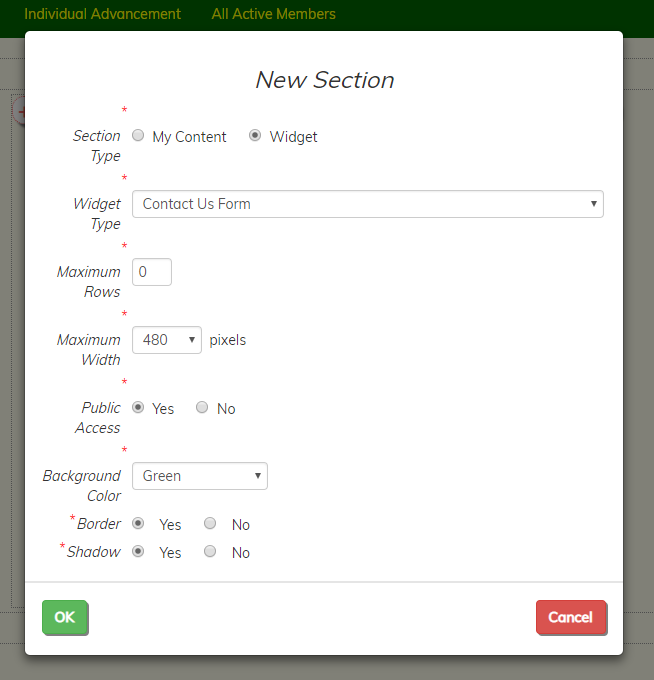
When you click the ![]() icon, the system will display this pop-up window with the settings for your new section.
icon, the system will display this pop-up window with the settings for your new section.
Choose between "My Content" which will allow you to enter text and images, or "Widget" which will fill the section with information from your database.
If you select "Widget" you'll then choose the type of information you want to display in this section. Your choices currently include:
- Photo Gallery Preview, which displays the first photo from each of your most recent events which have photos.
- Announcements & Upcoming Events, which displays current announcements followed by a list of upcoming events.
- Announcements, which displays current announcements.
- Upcoming Events, which displays a list of upcoming events.
- Recent Events, which displays your most recent events.
- Our Adult Leaders, which lists your current adult leaders, sorted by the highest position each holds.
- Our Adult Leaders - By Position, which lists each leadership position, showing the current members holding each position.
- Surveys, which displays current survey questions.
- Contact Us Form, which displays the Contact Us form.
For any of these widgets you can specify the maximum number of entries that will be displayed. This can be used to limit the height of this section
The Maximum Width will default to an appropriate value for the type of section you've selected. For "My Content" sections, this can be used to adjust the height of the section.
Public Access determines whether the public can view this section without logging on. If you select "Public Only", the section will be visible before you log on, but not after.
The default Background Color is "transparent", but you can change this to any color you want. The drop down list gives you some standard choices, but if you select "Other" you'll have the opportunity to enter any RGB color you'd like. On most brosers other than Internet Explorer you should see a color picker.
Border will draw a border around this section and Shadow will create a shadow effect behind this section.
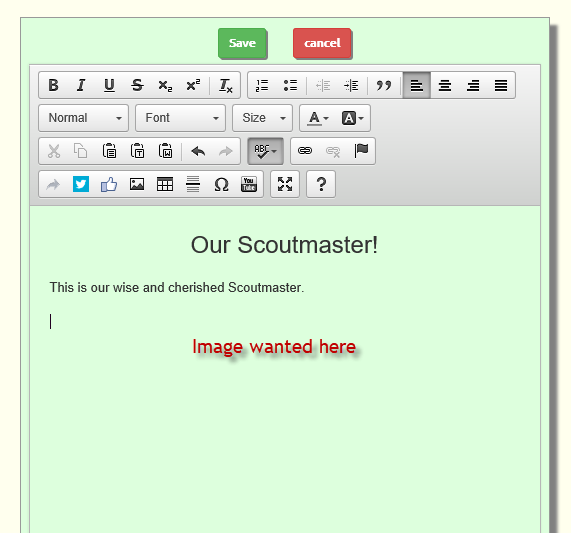
WYSIWYG Editor

Clicking the "Edit" button will open up the editor for that section, as shown above.
This is the same editor you use when you compose an e-mail message. It gives you control over font size, color, and other formatting.
You can drop images into this section and resize them by pulling on the lower right corner of the image.
Best of all, if you accidentally delete your work, the Restore button at the bottom of the editor window will let you pick an earlier version of this content.
Source
The "Source" button will display the raw HTML source code for this section, as shown above.
You can edit the HTML, or copy and paste HTML that you've compsed in another editor.
There is no limit on the number of characters you can enter or copy into this window.
Note: If you add complex HTML to a section using the "Source" function, do not subsequently use the "Edit" function to modify it. The WYSIWYG editor may modify your HTML and remove some of your code.
Add Photos To Your Home Page
Most of the photos you add to your site will be linked to events. You will upload these photos to the photo gallery.
But you'll want to pick the very best photos to display on your Home page and other custom pages.
It's easy to add photos to your Home page and other custom pages - just drag and drop them into the edit window!
On most browsers, the Copy and Paste functions will work just as well, but we'll show you how to drag and drop here.
Begin by editing the page and either add a My Content section or edit an existing one.
Then, in another window, find the photo you want to copy to your page.
Position your cursor over this photo, hold down the left mouse button, and drag it to your edit window.
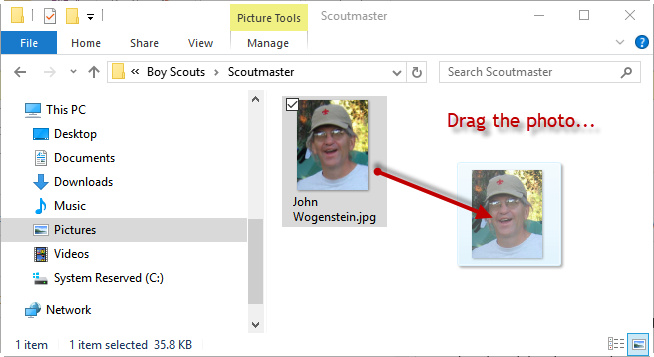
Once you arrive in the edit window, position the photo where you want it inserted and let go of the left mouse button to release it.
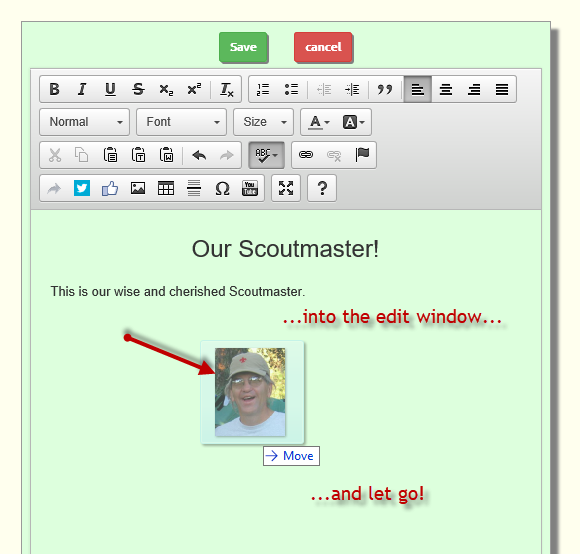
Wait a few seconds while the photo uploads to the TroopWebHost server. It will then appear full size in your edit window.
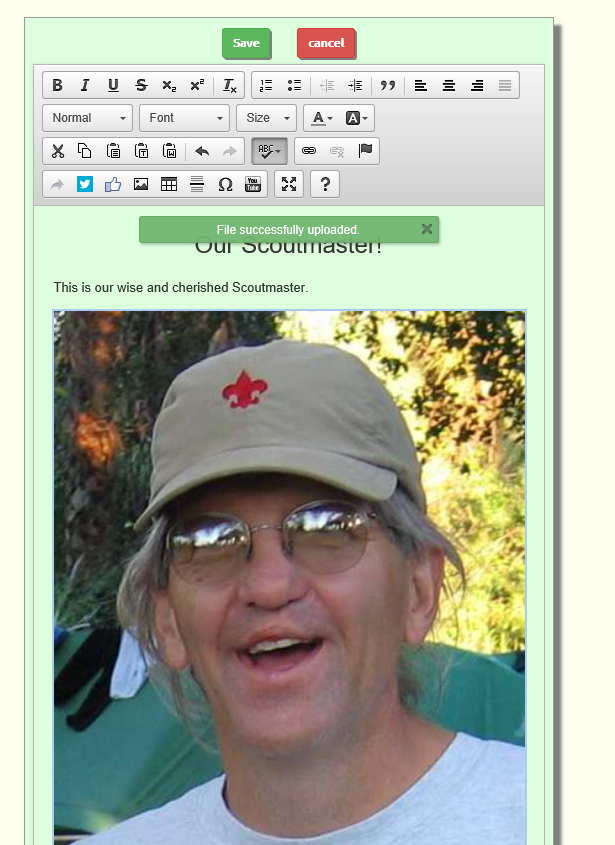
You can make it smaller by dragging the lower-right corner of the photo up or to the left.
Make it larger by dragging the lower-right corner down or right.

Once you're done editing the page, sit back and enjoy the view!
Design Ideas
OurGroupOnline gives you a lot of freedom to layout your Home page and other custom pages however you'd like.
Which means you could end up with a real masterpiece...or a real mess!
Here are some of our thoughts on how to design attractive pages with OurGroupOnline.
It's Responsive!
"Responsive" is a term used by web developers to describe pages that rearrange themselves based on the size of the screen on which they're displayed.
So on a big computer monitor, you might see a lot of information displayed side by side, but on a smart phone that information may be stacked vertically.
This approach makes the page easy to read on a smart phone, while taking full advantage of the screen real estate on a full-sized computer.
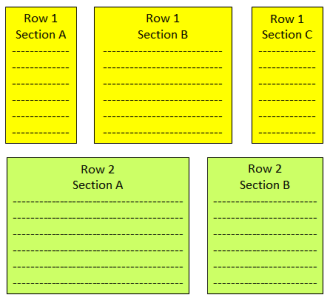
This is how side-by-side sections could be displayed on a wide screen:
In a narrower window, the sections will begin to stack vertically, as shown below at left.
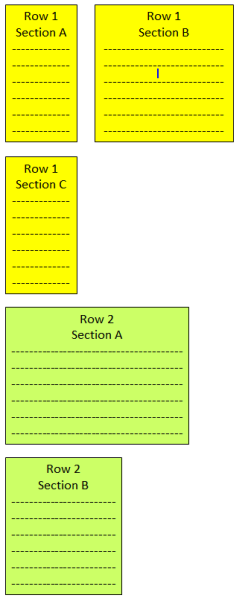

On a smartphone, all of the sections may stack vertically, as shown at right.
Note that the wider sections are resized to fit within the narrower width of the small screen, which can make the section taller.
Edit Wide
Due to this responsive behavior, it is best to layout your page on the widest screen you have available. This will allow you to see how your layout will appear for users with large monitors. It will also make it easy to add sections side-by-side.
Think Sideways
Consider creating all of your sections on the same row, side-by-side. This will allow your page to adjust to any width screen.
If you take this approach, avoid adding sections above or below your current row. Use the ![]() buttons directly to the left or right of existing sections to add new sections.
buttons directly to the left or right of existing sections to add new sections.
Then Narrow Your Perspective
Once you've laid out your page, test it on a narrow screen, like a smartphone. Or if you are working on a PC, make your browser window skinnier to see how it will look.
Width Affects Height
The Settings for each section let you control the maximum width of that section.
If you have sections side by side and one is much longer than the others, consider making it wider so that they line up better.
Or if you have one section that is much shorter than its neighbors, try making it narrower by reducing the maximum width.
 Color Adds Interest
Each section can be assigned its own background color. It can also have a border and shadow.
Play around with these options to come up with a pleasing design.
If you choose a dark background color, use light colored fonts to make your text stand out.
Going It Alone
Advanced web developers may wish to create pages with only one section so they can design the entire page using their own web design tools.
You can then paste your code into the page using the "Source" button for that section. You'll probably want to select the largest possible maximum width for this section, and then control the width of your elements using the appropriate CSS tags.
Keep in mind that the Bootstrap libraries are automatically included with each page, so you can reference any of the Bootstrap classes.
You can also create additional classes in your own custom CSS and reference those classes from your pages.
If you wish to create your own responsive sections, use the following code to begin a new row that contains multiple sections:
<div class="new-row">
<div class="container-fluid container-flex">
Each section should then be defined by a <div>, which can be styled as appropriate.
Obviously, you'll need two </div> tags at the end of each row to close out the tags shown above.
Creating Links to Other Websites
 Many troops
want to include hyperlinks to other scouting sites on their
Home page, like to their council's home page or other scouting resources.
Many troops
want to include hyperlinks to other scouting sites on their
Home page, like to their council's home page or other scouting resources.
Some troops also want to include e-mail links to their leaders from their Home page or their About Us page.
TroopWebHost has several ways to accomplish this, which we will describe on this page.
Adding Links To Your Home Page Or Other Custom Pages
If you use the Edit button to edit a section of your home page, the editor window has a toolbar at the top that contains a Link control, as circled below.
Click on this button to begin adding a hyperlink to your page.
This will open up a dialogue box that looks like this:
Enter the text you want to appear within the link in the Display Text box.
Your choices for Link Type are:
- URL to link to another web page, either on this site or another site.
- Link to anchor in the text to link to another section of the page you are currently on.
- E-mail, to initiate an e-mail to a specified address.
If you choose URL as your link type, the dialogue box will remain as pictured above.
The Protocol should be set to "https://" if the site you are linking to is encrypted; this should always be your choice when linking to another page on your TroopWebHost site. If you are not sure, select "http://" as your protocol.
The URL is the address of the page you wish to link to, without the "http://" prefix.
Click the Target tab to finish adding your link.
If you are linking to a different website, change the selection for Target to "New Window (_blank)" as shown above. This will prevent errors from occurring if the link does not use the "https://" protocol.
Click OK to finish adding the link.
How To Find The URL For A Page On Your TroopWebHost Site
If you wish to link to another page on your TroopWebHost site, it may not be obvious how to determine the URL. That is because the site is displayed within a frameset, which hides the specific URL of the page you are on from the browser's URL window.
To determine the URL of a page on your site, first go to that page. Click on the ![]() icon
in the upper right corner of your page to open the Help menu.
icon
in the upper right corner of your page to open the Help menu.
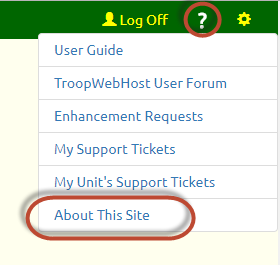
Select About This Site to view the pop-up window.
The URL for the current page is displayed at the bottom of this window.
Adding An E-Mail Link To Your Home Page Or Other Custom Pages
One of your choices for URL Type, as shown above, is "E-mail".
Choosing this option will reformat the dialogue box to look like this:
Enter the desired e-mail address in the E-Mail Address box.
This will create a link that will open the user's e-mail client to begin sending an e-mail to this address.
The other two fields are optional. The Message Subject box will pre-fill the subject line of the e-mail message. The Message Body will pre-fill the message body of the new message. The user can change either of these when they edit the message.
Adding Links To Announcements
The technique described above can also be used to add links to your announcements, which will appear in any announcement widgets on your home page or other custom pages.
Be sure to use the Link control to create your link, as illustrated above.
Do NOT simply copy and paste the URL into the text of your announcement. This can cause formatting problems, especially if it is a lengthy URL.
Web Links
The Web Links page is a convenient place to maintain links to other scouting resources. Please click here to learn how to maintain the links on this page.
Coding Links With HTML
If you are using the Source button to edit a section of your home page, or if you want to incorporate links into a text field that does not use the WYSIWYG editor, you may need to code your links using HTML.
HTML is a special kind of text that uses the < and > characters to mark off special commands (often referred to as "tags") for formatting a web page.
Here is what a hyperlink looks like in HTML:
<a href="https://www.TroopWebHost.com" target="_blank">Click here for Troop Web Host</a>
The text in between the > and < signs is what is displayed on the page (often in blue underlined letters). The URL that is within the quotation marks is the target address for the hyperlink; that is where the visitor will go when they click on the link.
So the link shown above would look like this if you included it in your web page:
HTML tags usually come in pairs, so the <a> tag must be followed by a </a> tag.
Creating An E-mail Link
If you want to create an e-mail link that will initiate an e-mail to a specific address, replace the URL with a string that begins with mailto: followed by the e-mail address.
For example, <a href="mailto:Info@TroopWebHost.com">Contact Us</a> will send an e-mail to Info@TroopWebHost.com.
This is how that link would look on your page: Contact Us
HTML Coding Rules
Here are some rules to follow when coding HTML:
- Each tag begins with a < character and ends with a > character. Therefore you must always follow a < character with a > character.
- Likewise, you must always follow a quotation mark (") with another quotation mark at the end of the expression, such as the URL in your hyperlink.
- Every tag must have a corresponding closing tag. E.g., <a href="www.URL.com"> must be followed by </a>
If you get in trouble, please send us a Support Ticket and we'll help you out.
Announcements
 Sometimes you need to get information out to
everyone in your troop. That's what Announcements are all about!
Sometimes you need to get information out to
everyone in your troop. That's what Announcements are all about!
Announcements can be displayed in any or all of the following locations:
- On your Home page or any custom page, by adding an "Announcements" widget to that page.
- In the Automated Newsletter.
- On the home page of the TroopWebHost Mobile App.
Each announcement has a starting date and an ending date. An announcement will only be displayed during that period.
To create an announcement go to Home → Add & Update Announcements, then click the Add An Item button to bring up a page like this:
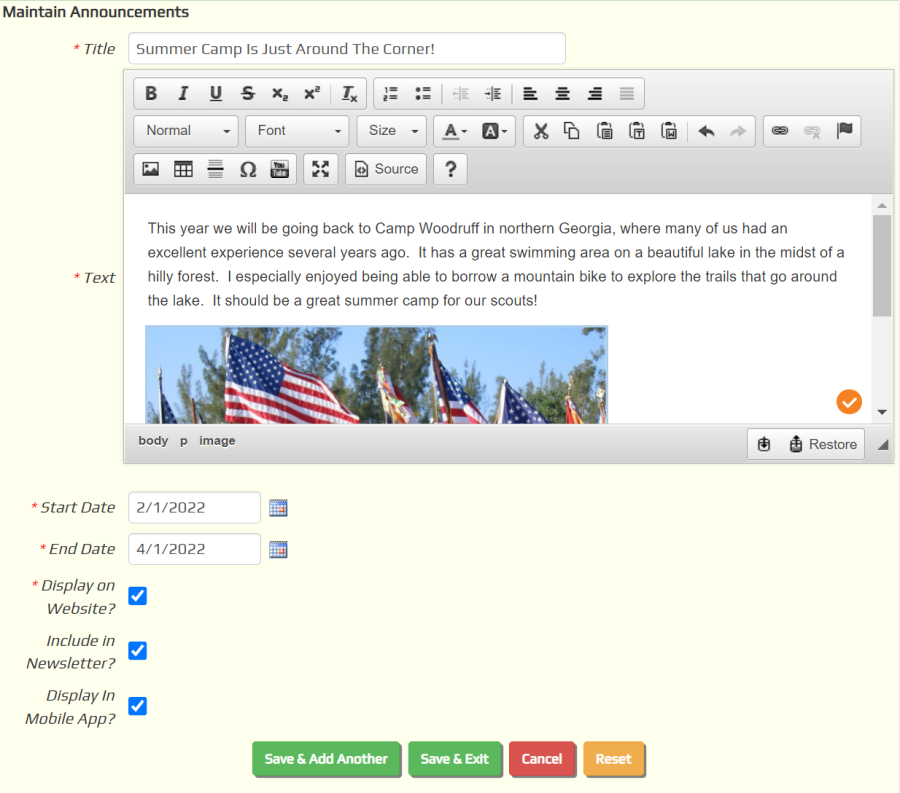
The Title will be displayed as a heading in bold-face characters and the Text in regular characters.
You can format the text using the buttons in the text editor. You can drag and drop images into the announcement the same way you add photos to the Home page.
The Start Date is when you want the system to begin displaying this announcement; the End Date is when you want it to stop.
You can control where the announcement appears by checking or unchecking these options:
- Display on Website will cause this announcement to appear wherever you've placed an announcements widget, which can be on the Home page or any custom page.
- Include in Newsletter will cause this announcement to appear in the Automated Newsletter.
- Display in Mobile App will cause this announcement to appear in the home page of the TroopWebHost Mobile App.
The order in which announcements appear is controlled by the Start Date, as follows:
- In the "Announcements" widget, the announcement with the latest Start Date appears at the top.
- In the "Announcements and Upcoming Events" widget, the announcement with the earliest Start Date appears at the top.
- In the automated newsletter, you can control the order on the Automated Newsletter settings page.
- In the TroopWebHost Mobile app, the announcements are displayed in the order in which they were added to the database.
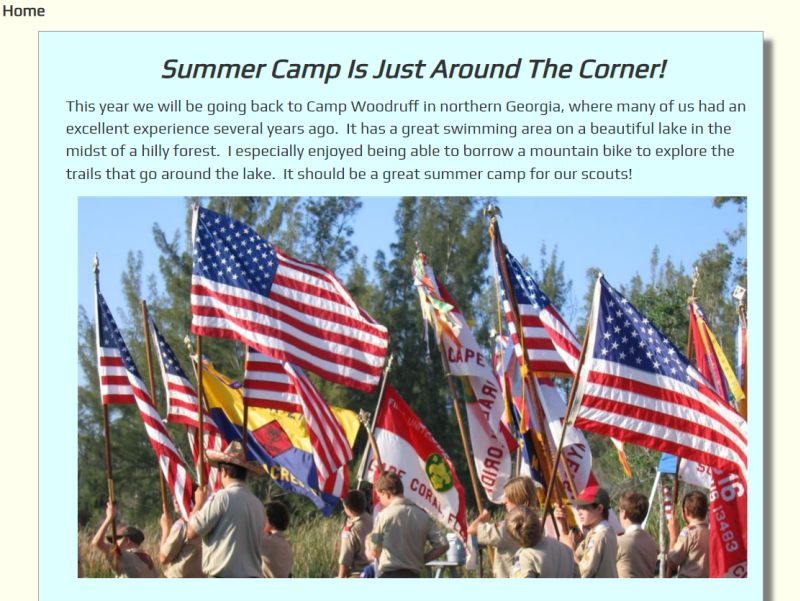
This is how this announcement might be displayed on the Home page.
Creating A Banner Image For Your Page Heading
One special feature of your Home page is that it can feature a banner image at the top of the page. Here is an example from our Cub Scout demo site.
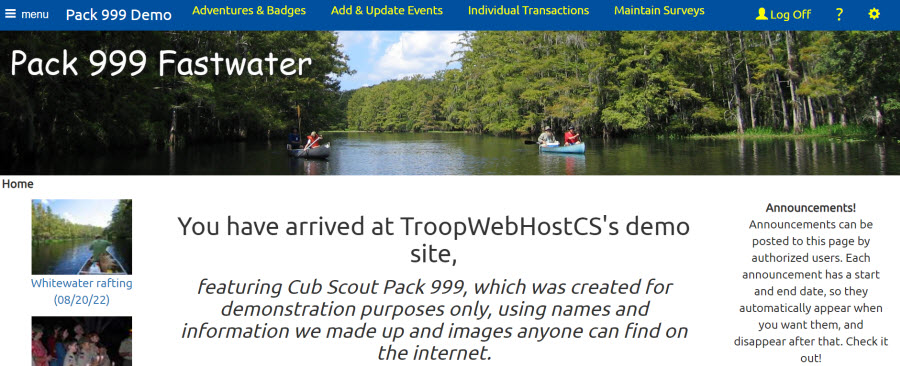
The banner image displays directly below the top menu row and above any other page content.
We recommend that you find someone in your group who has experience with image editing software, like Adobe Photoshop. Ask them to create a suitable JPG image file that is at least 1920 pixels wide so that it will fill the width of a standard 1080p monitor. At that width the image should be no more than 500 pixels high, so that you can still see the body of the page below it.
You may want to superimpose your group's name on the image for a more professional look.
For more inspiration, check out the Website of the Month that is announced each month in the TroopWebHost newsletter. You'll see some great examples of banner images in many of those sites.
Once you have an image file (it must be on your local drive), go to the Site Appearance page, in the Site Configuration menu, and click the Browse... button to find the image file on your computer. You can then click the Save button to install the image.
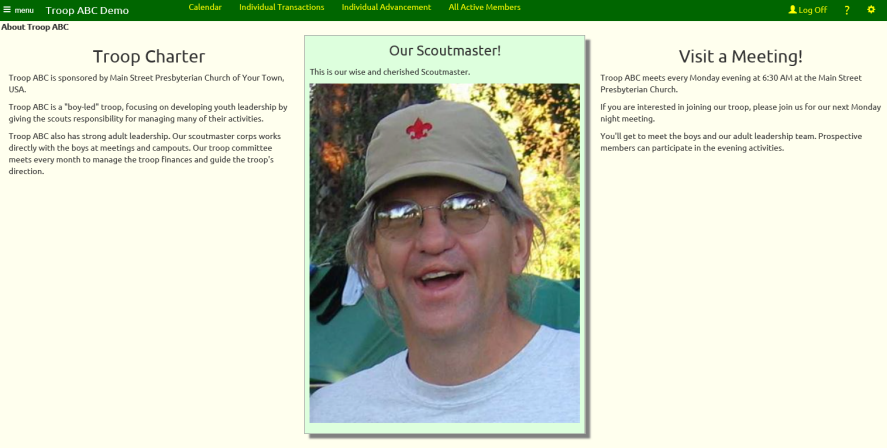
About Us
The About Us page is another public page that you can edit in the same way that you edit your Home Page.
As a user with web page editor privileges, go to Home ? About Us and click on the Edit button at the bottom of the page to begin entering a description of your group.
Things to consider including on this page:
- History of your group
- Your philosophy or goals
- Information about your parent organization, if you have one
- Meeting schedule
Here is an example of an About Us page:
Custom Pages
Your site administrator can add custom pages to your Home menu. You will then be able to add text and images to these pages.
Custom pages can be on any topic, like:
- How to join the troop
- The history of scouting
- How you advance in scouting
- Elements of the boy scout uniform
- Fundraisers
- Eagle scout honor roll
- Administrative issues
You will be able to edit each custom page in the same way that you edit your Home page.
Select Manage Custom Pages from your Home menu to see a page like the one shown below.
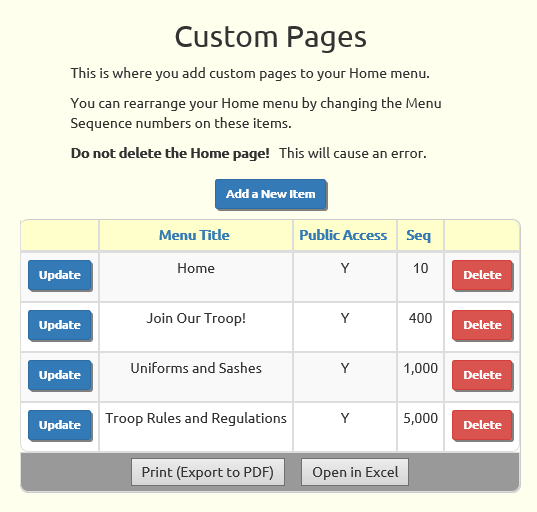
Use the Add a New Item button to begin adding a new custom page. Once the page has been added you'll be able to select it from your menu and then edit it the way you edit your Home page.
You can update the settings of existing custom pages and delete pages you no longer need.
Click the Update button to view a screen like the one shown below.
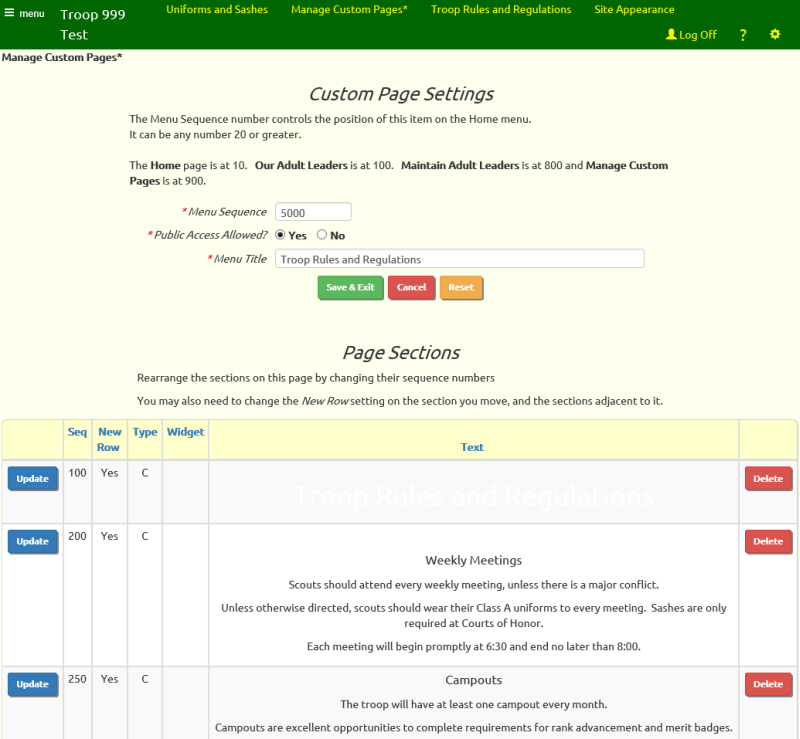
You can change the position of a page on the Home menu by changing its Menu Sequence number.
You can also rearrange the sections on a page by changing the Sequence numbers on those sections.
Click the Update button on any section to update its Sequence number and other characteristics.
Maintain Surveys
From time to time, you may want to poll your members on a topic of importance to the group, like where to hold your next banquet, or whether to set aside funds for an annual event. Surveys offer an excellent way to ask questions like this and let everyone cast their vote.
To create a survey, go to Home → Maintain Surveys.
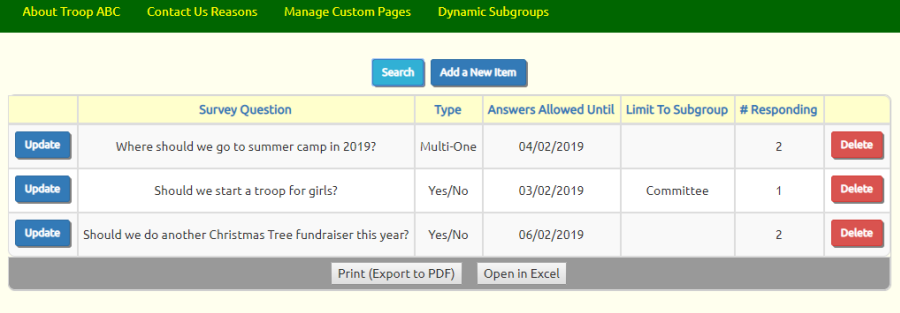
Click Add a New Item to add a survey.
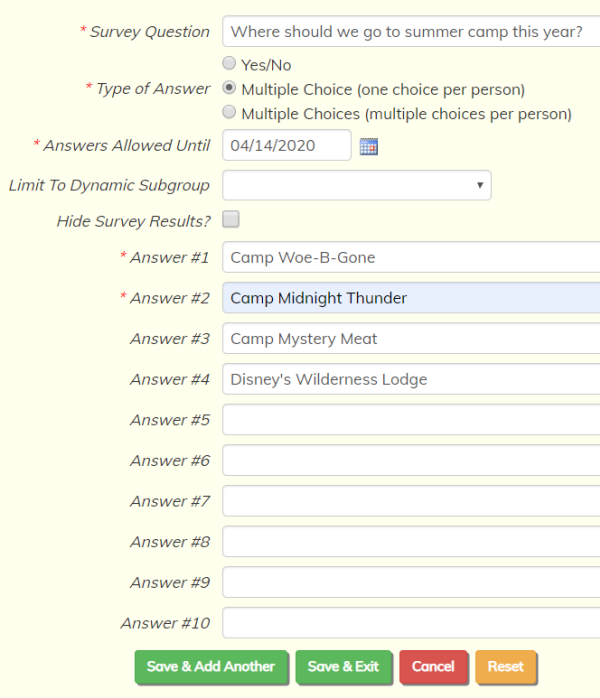 Enter the question to be posed in the first field.
The Type of Answer can be:
- Yes / No
- Multiple Choice, with each member only allowed to vote for one answer
- Multiple Choice, with each member allowed to vote for as many answers as they wish
Surveys may be limited to the members of a dynamic subgroup by selecting that group from the list.
If you select Hide Survey Results, you will only be able to view the vote counts for this survey from the Maintain Surveys page. Members will not be able to see the survey results from the My Stuff → Surveys page.
You must enter at least two possible answers for each survey question.
Click Save & Exit to save this survey.
Click the Update button to update an existing survey.
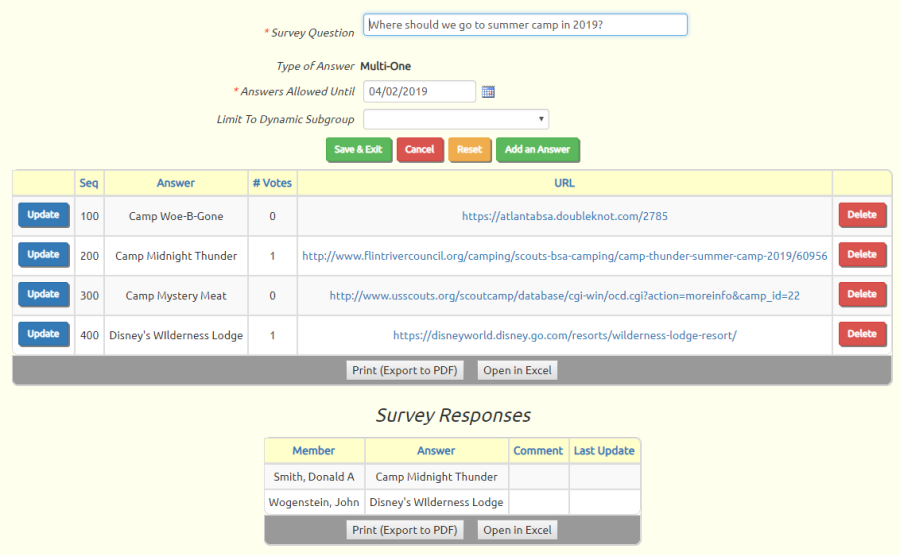
You can see how many votes each question has received in the first grid.
The second grid shows you the individual votes, along with any comments they've entered.
You can update individual answers to add a URL for that answer. This URL could be a link to relevant information for that answer, such as a summer camp's website.
Display Survey Questions On Your Home Page
You can display the currently open survey questions on your Home Page or any custom page by adding the "Surveys" widget to that page.
Go to the page where you want to add the survey widget and select Edit This Page from the Tools menu, as shown here.
Click on a ![]() button
to add a section in the desired location.
button
to add a section in the desired location.
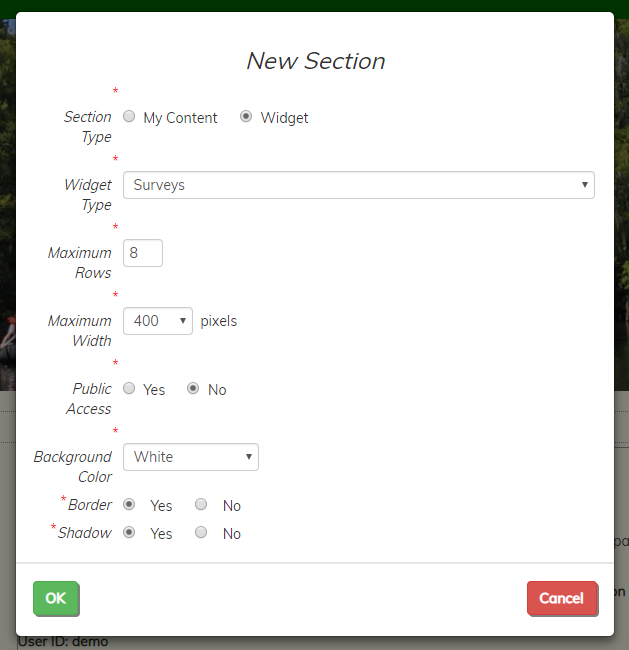
Select a Section Type of "Widget", then choose "Surveys" from the list of available widgets.
We recommend that you set Public Access to No, since only members can vote on survey questions.
Set the Background Color, Border, and Shadow as desired to highlight this section.
Click OK to save your new widget.
The Surveys widget will only display when there are open survey questions.
Contact Us
The Contact Us widget allows non-members visiting your site to post a message to your leaders. The type of message can determine which leaders are contacted.
You can add the Contact Us widget to the Home page or any custom page by going into edit mode on that page and clicking one of the plus signs (+) to add a new section. Obviously, this should only be added to a page that is visible to the public.
As shown below, select a Section Type of "Widget", then select "Contact Us Form" as the Widget Type. Do not select a Maximum Width less than 400, as the entry fields will not fit in any narrower width.
Do consider choosing a Background Color and enabling both the Border and Shadow properties.
Click the OK button to save this widget. It will then be inserted into your page, as illustrated here:
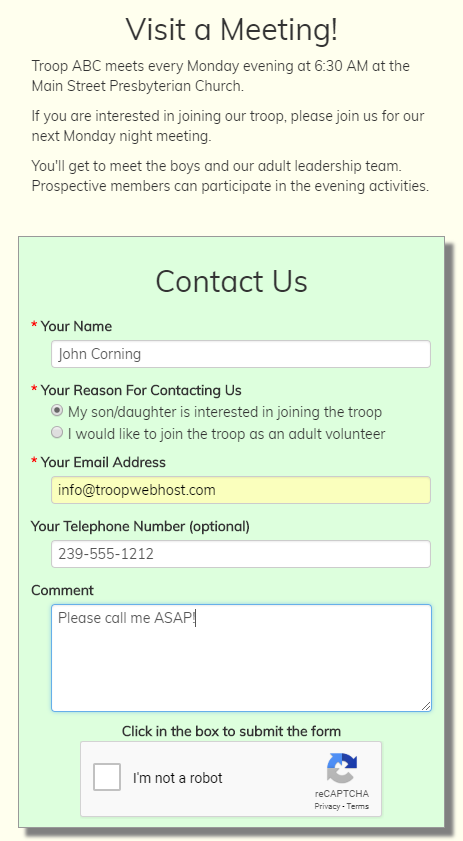
The reCaptcha control will not display until the user enters information into the first three fields.
When the user fills out the form and clicks on the reCaptcha box, the information will be saved to the Contacts table and an email will be sent to selected leaders. "Which leaders?" you might be asking. That's what we're going to talk about next.
You can view all of the messages received from your Contact Us page by going to Home → View Contacts
You may have noticed that Your Reason For Contacting Us lists the possible reasons this person is contacting your unit. You can configure this list by going to Site Configuration → Contact Us Reasons.
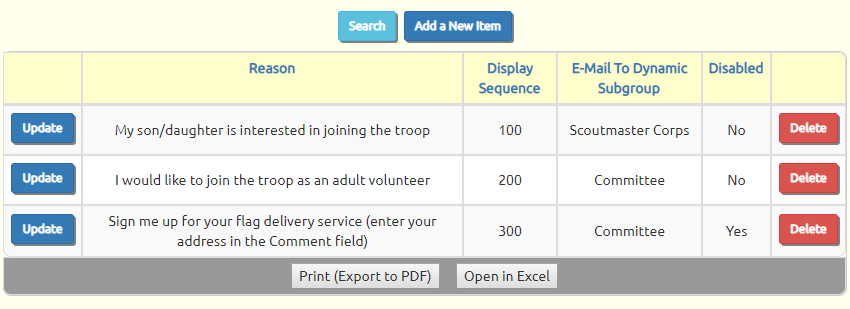
This is where you maintain the list of reasons that will be available on the Contact Us form. Click Add a New Item to add a new reason, or click Update on any row to update that row.
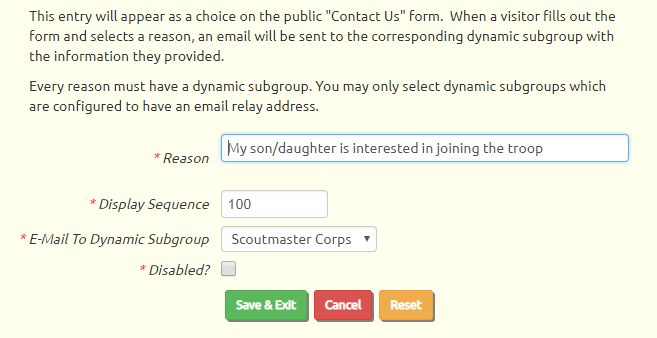
The Reason is the text that will be displayed on the form. It should be considered from the perspective of the visitor who is filling out the form. Here are some examples:
- My son/daughter is interested in joining the troop
- I would like to schedule a visit to your troop
- I am interested in joining as an adult volunteer
- Sign me up for your flag display fundraiser (enter your address in the comment field below)
The Display Sequence is a number that determines the order in which this entry will appear on the list, relative to the other entries.
E-Mail To Dynamic Subgroup determines who will receive the message when this reason is selected. If you are not familiar with Dynamic Subgroups, please read this page of this User Guide to learn how to create them.
You must select a Dynamic Subgroup for each contact reason. When a user selects this contact reason and submits the form, an e-mail will be sent to each member of the corresponding Dynamic Subgroup.
If the drop down list is empty, this means you have not yet created any Dynamic Subgroups. You must create at least one Dynamic Subgroup before you will be able to create or modify any contact reasons.
View Contacts
Once you've implemented the Contact Us widget on one of your public pages, visitors may start using it to send messages to your troop. Each message will be sent to the designated Dynamic Subgroup for the reason they selected, but it will also be stored in your database.
You can view all of the messages received from your Contact Us page by going to Home → View Contacts, as shown below.

Click View to view a contact, or Delete to remove it from the saved contacts.
Our Leaders

The Our Leaders page is a public page that is automatically generated by your OurGroupOnline software using the information you have entered about your leadership members.
For each member of your group with a leadership position, it will display:
- Photo (if available)
- Name
- Current leadership position(s)
- Biography (if available)
The leadership position(s) are derived from the information you enter on the Leadership page.
The rest of the information comes from each person's membership record, which you can modify on the Active Members page.
Your leaders can enter this themselves using the My Stuff menu.
Encourage your leaders to go to My Stuff → My Contact Information and...
- Upload a photo (preferably a "head shot" that is cropped close to their face).
- Write a brief biography telling about themselves and their involvement in the group.
The Our Leaders page will display all of your members who currently hold a leadership position.
If you wish to exclude a person from this page, update his or her record from the Active Members page and click on Don't include on public leaders page, as shown below.
You may also exclude members from this page based on their position, by checking the Do not display this position on the public Our Adult Leaders page box on the Leadership Positions page.
Web Links
You can put links to useful webpages on the Web Links page. It can be found at Resources → Web Links.
This page will display a set of links you have entered with titles on the left. It is sorted alphabetically. The page will be blank if no links have yet been entered.
An example of a Web Links page with several links is below.
You can add or remove links on the Web Links page by using the Maintain Web Links page. Users with the appropriate level of access can reach this page through Home → Add & Update Web Links.
On this page, you can see a list of the URLs and titles that have already been entered. You can edit these using the Update buttons, or use the Add a New Item buttons to create new links.
The URLs you enter must include the http:// or https:// extensions. You can link to any resource, including files such as PDFs or images.
Keep in mind that you cannot link to any files on your own computer.
To upload a file, consider using the Add & Update Forms or Upload Photos pages.
Forms & Documents
The Forms & Documents page on the Resources menu allows visitors to download forms and documents used by your unit, such as the new scout registration form or camping permission slips.
This can include links to forms that are on other websites, such as your area council.
If you've organized your forms into categories, the page will display each top level category as a folder.
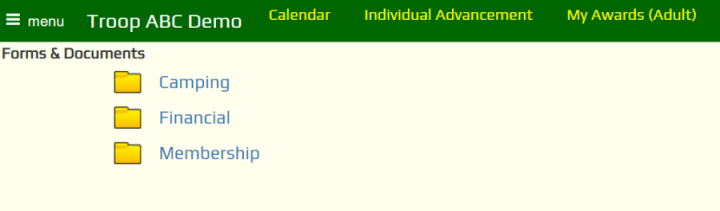
Click on a folder to open it up.
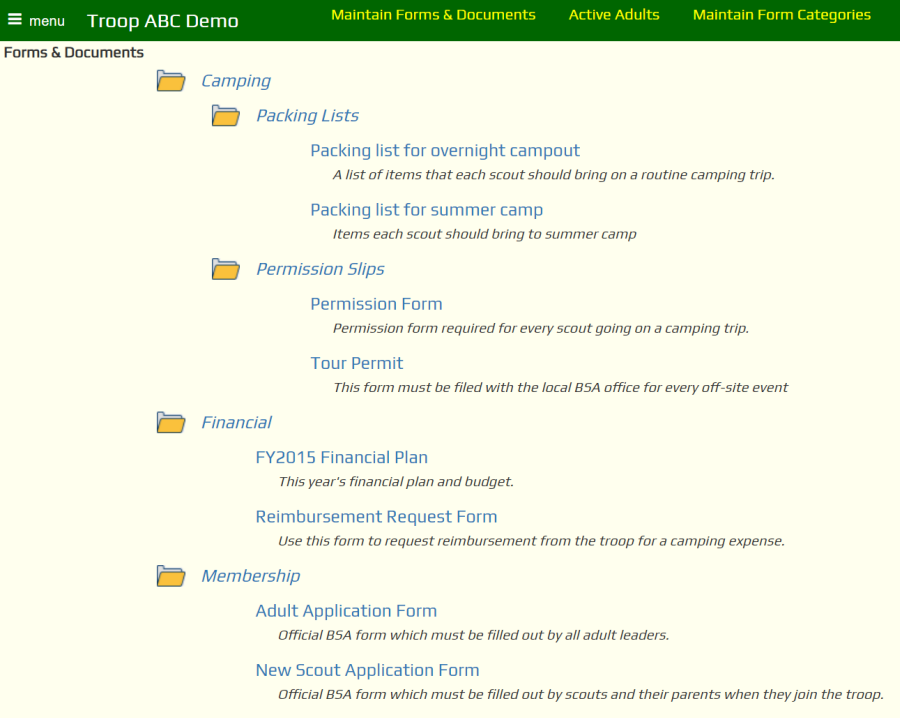
Click on the title of the form to open that document on your computer.
After you log on it will display other documents that you have limited to authorized users.
You can add forms to your site by going to Resources → Add & Update Forms.
Record Your Events with Photos and Videos
 It's fun to share photos and videos of your group's activities.
It's also a great way to attract new families to join your group.
By default, the Photo Gallery and Video Gallery are both accessible to the public without logging on. However, you can remove them from public access as shown on our Control Public Access page.
All photos and videos must be associated with an event. When you upload photos or videos, you begin by picking the event they were from.
Photos will be resized when they are uploaded to our server to save space. From the Site Appearances page you can control how large of an image will be stored. You can also choose to store an archive copy of each photo at a much higher resolution for later download. This may result in additional charges the next time you renew your subscription.
Photos may be uploaded directly to your site, either one at a time or in groups.
Videos are uploaded to YouTube™. You then create links to each video on your site to populate your Video Gallery.
Photo Gallery
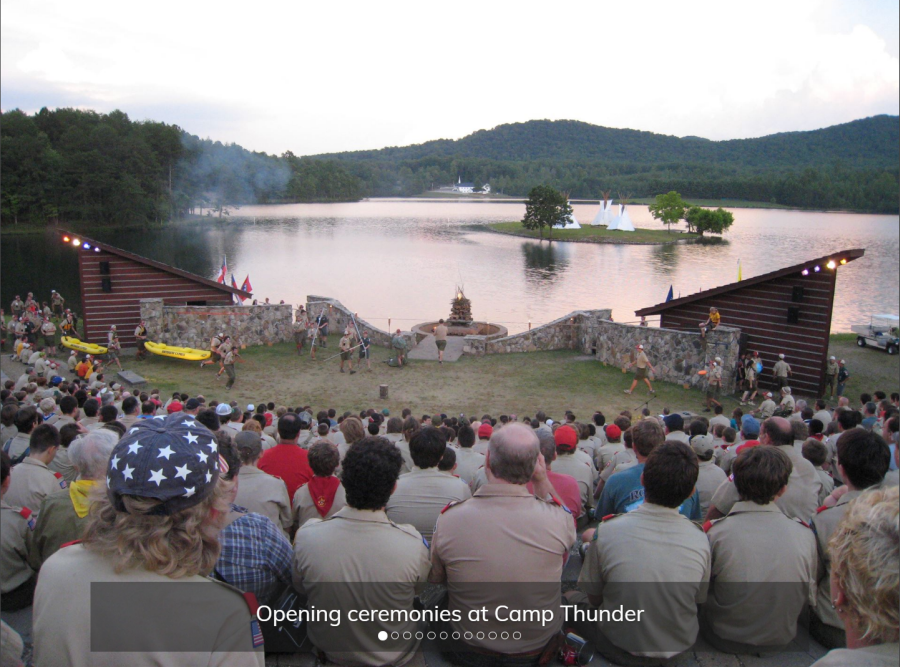
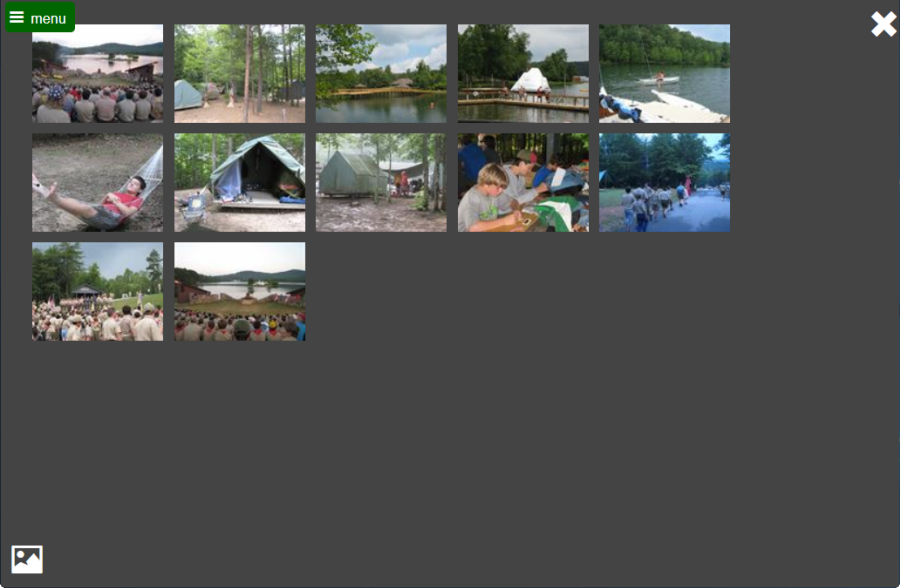
The Photo Gallery, accessible from Photo Gallery → View Photos, displays the first photo from every event for which you've uploaded photos.
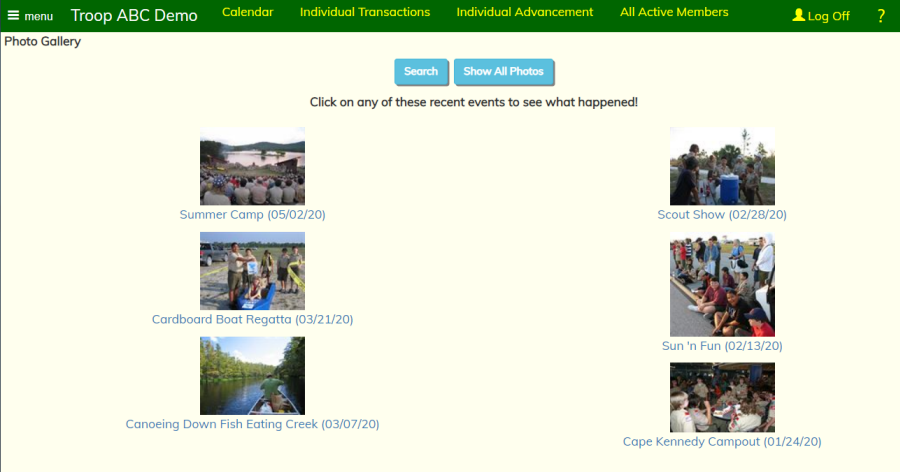
Click on a photo to view a slide show of all the photos from that event.
Slide Show
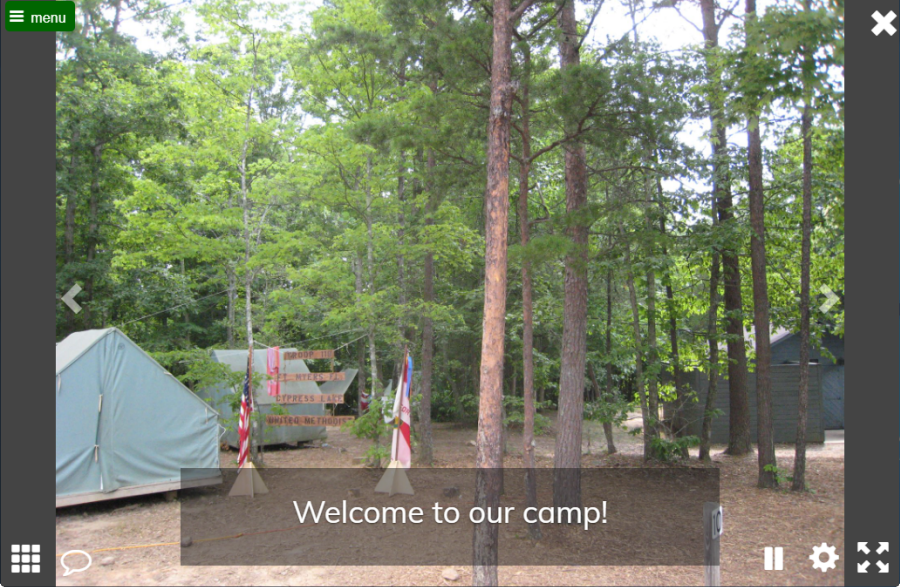
The slide show begins with an overlay giving the name, date, and location of the event, along with any highlights you entered in Upload & Maintain Photos for this event.
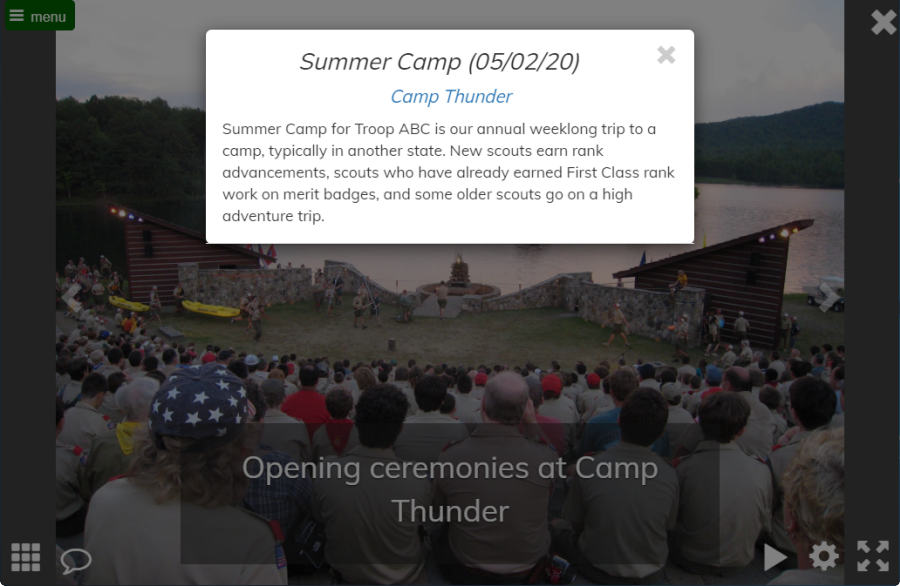
To begin the slide show, close the title pop-up by clicking on the X in the upper right corner. The system will pause on the first image, then will automatically display each subsequent image.
Click on the right or left arrows to manually go to the next or previous slide. On some touchscreen devices you may be able to "swipe" the page right or left to achieve the same effect.
In the lower right corner you see several controls.
Click on the Pause control to stop the automatic movement

Click on the Cog icon to adjust the settings for the slide show.

The Settings page lets you control many aspects of the slide show.
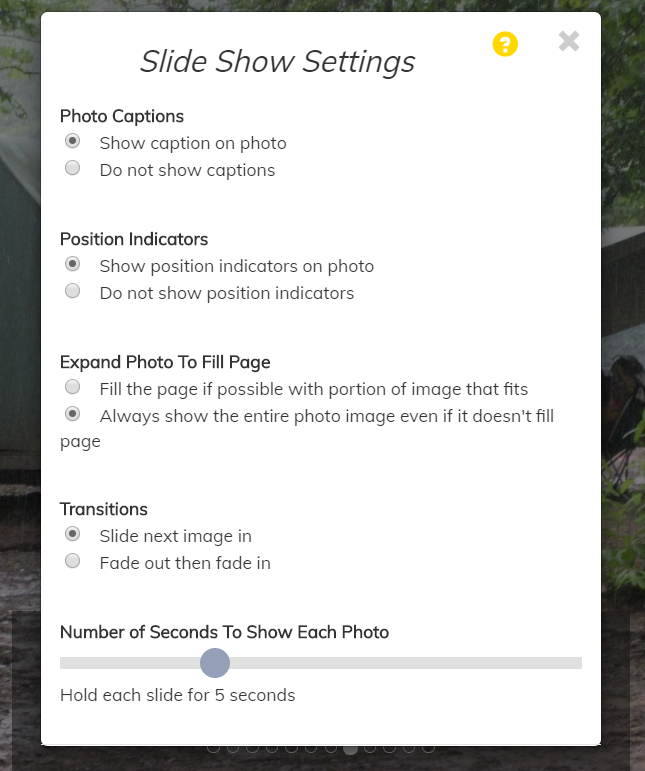
The slideshow will change immediately when you change any of the settings. Feel free to try all of them!
Your selections will be immediately saved to a cookie on your device, so the next time you display a slide show they will still be there.
The Expand icon will put your browser into Full Screen mode, allowing you to see the biggest possible image.

On most browsers you can click the escape key (ESC) to exit full screen model.
There are two controls in the lower lower corner of the page.
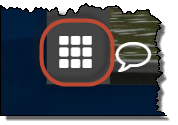
The first icon will take you to the Thumbnails page.
Click on any of the thumbnails to return to the slideshow page, paused on that image.
Click on the X in the upper right corner or the icon in the lower left corner to return to the slideshow where you left off.
The "cartoon bubble" icon will redisplay the title pop-up.
Video Gallery
The Video Gallery, found under Photo Gallery → View Videos, displays the first video from every event for which you've loaded videos on YouTube™.
Click on a video to play that video immediately.
Use the buttons at the bottom of the video window to pause and restart, control volume, and switch to full screen mode.
Click on the name of the event to the left of each of the videos on this page to see all of the videos for this event.
Click on the View All Videos button to see a list of all of the videos for this group from all events.
Upload Photos
Select Upload Photos from the Photo Gallery menu to upload photos from recent group events.
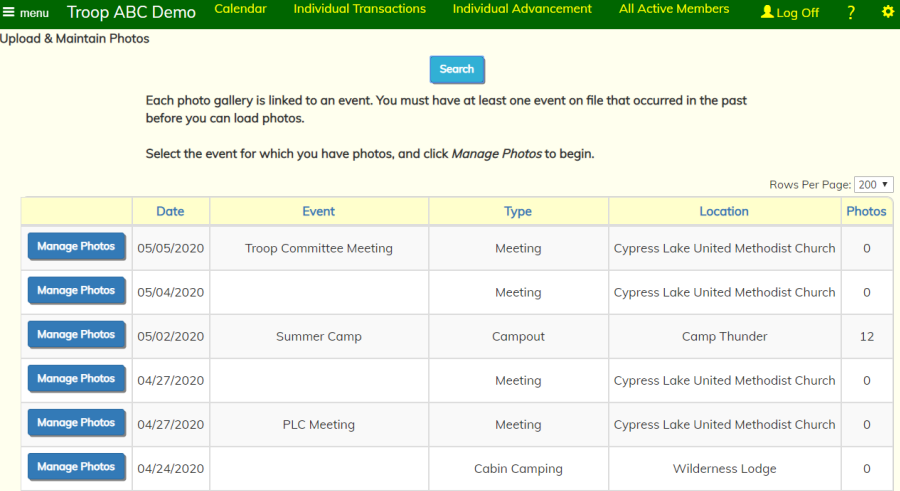
Photos must be associated with an event. Select your Event and click Upload Photos.

Write a brief summary of the event in Highlights. This description will be displayed at the beginning of the Photo Gallery slide show.
Click Save to save your work.
You can either upload photos one at a time, with the option of writing a caption for each one as you go, or you can upload a group of photos with no captions.
Click Upload Multiple Photos to quickly upload a group of photos to your site.
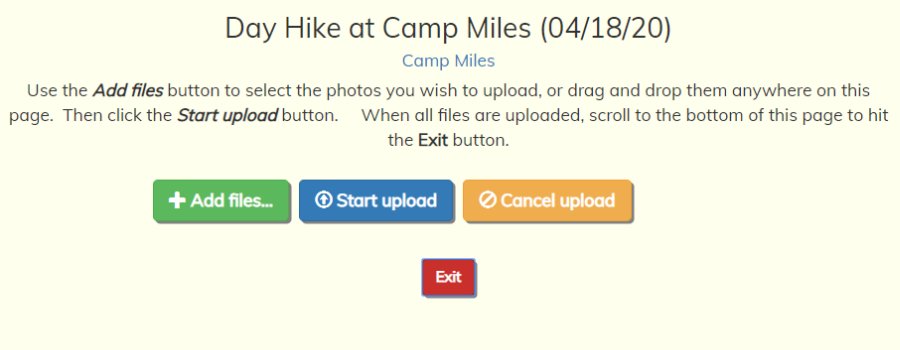
Click Add Files to select a group of files to upload, or drag and drop them anywhere on the page, or copy and paste them into the page.
A list of files should then appear, as shown here.
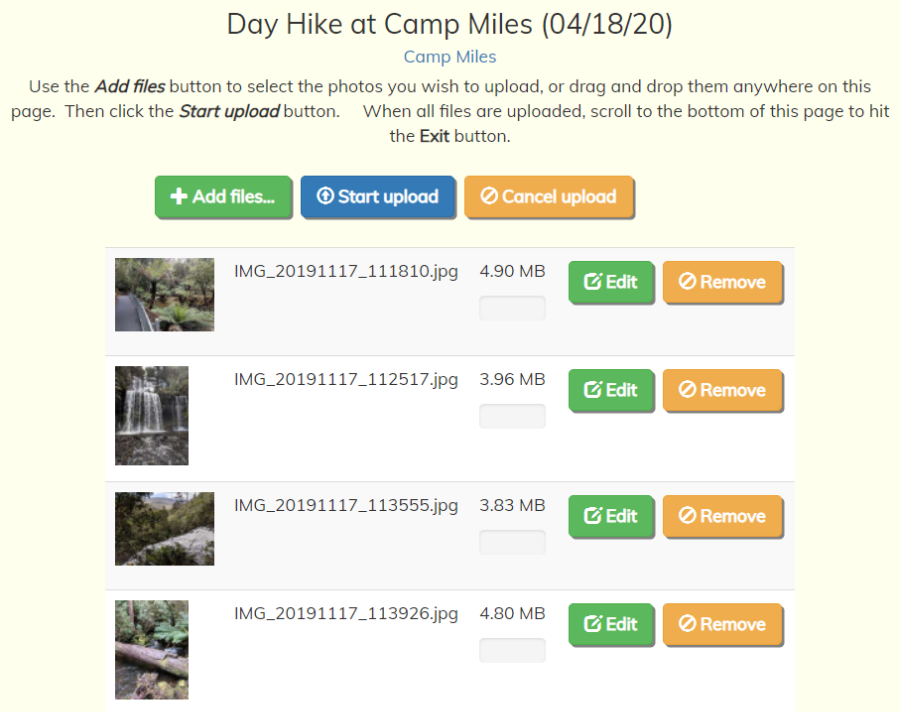
Use the Edit button to crop or rotate your images before uploading them. This tool is not available after the photo has been uploaded to the server.
Click Start Upload to begin transferring the photos to the server. The photos will be resized to fit within the limits you configured on the Site Appearance page.
Once the upload has completed, scroll to the bottom of the page and click Exit to return to the previous page.
You will now see all of the photos you uploaded listed down the page.
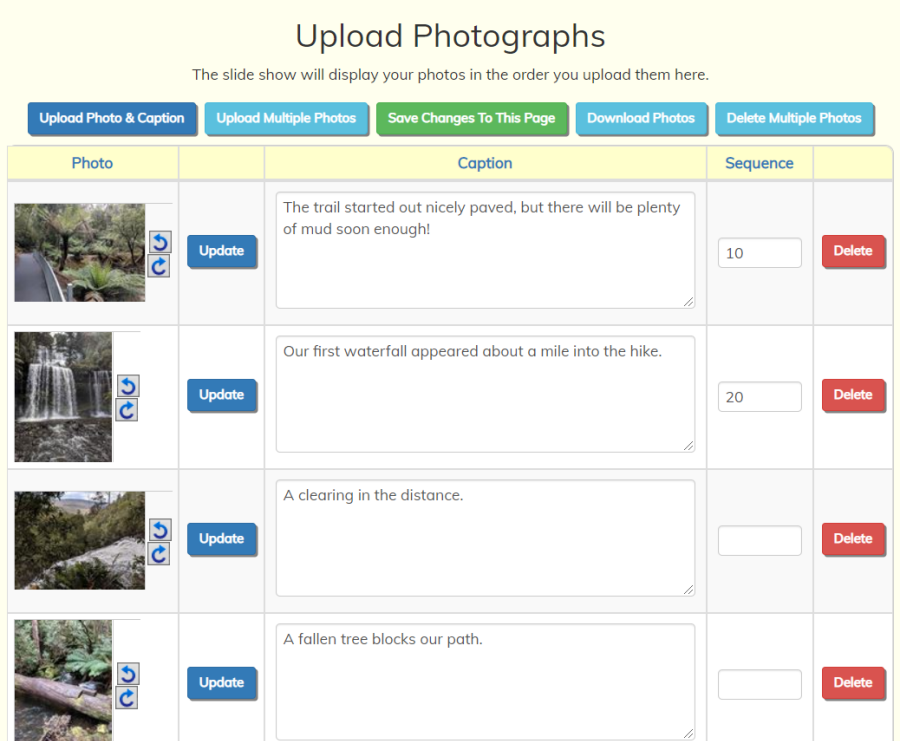
Enter a Caption for each photo and use the Sequence field to control the order in which they will be displayed.
Be sure to click one of the Save buttons at the top of the page to save your work.
Download Photos
You can use OurGroupOnline as your group's photo repository. Use the Site Appearances page to control the maximum resolution at which images will be stored. It is not necessary to select the Save High Resolution Image (Archive Only) option to use this feature, although that option will significantly improve the quality of the images you can download.
To download the photos from a given event, go to Photo Gallery → Download Photos. This function is also available from Upload Photos page after you select an event.
This function is only available to your Site Administrator and users who have a User Role authorized for the Download Photos task.
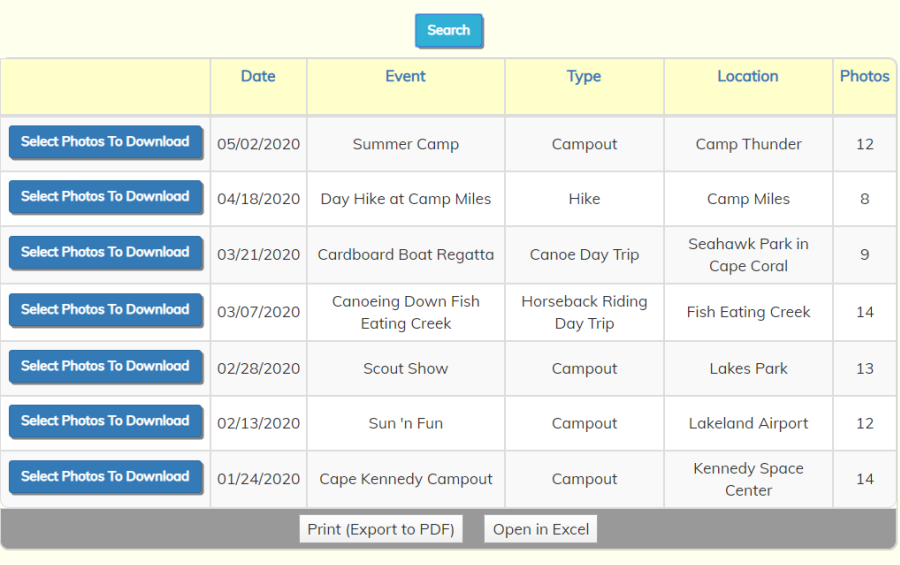
This page only displays events that have photos. To begin downloading the photos for an event, click the Select Photos To Download button next to that event.
This will display a list of the photos for this event, as shown below. Click on the checkbox next to each photo you wish to download.
Note that you can click the checkbox in the header row to select all photos. Click there again to clear all of your selections.
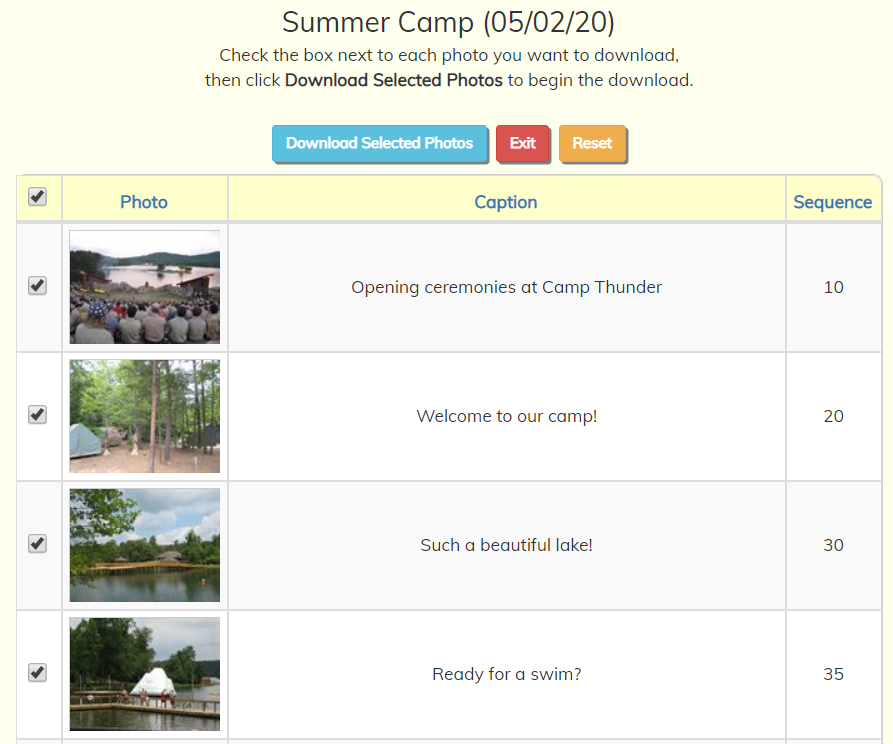
When you have selected all of the photos you wish to download, click on Download Selected Photos. This will create a zip file containing all of the photos, which will be transferred to your device.
If we have a high resolution archive copy of the selected photo, that high resolution image will be the one that we download. If not, we will download the highest resolution copy available of that image.
Depending on the number of photos you selected, the size of the images, and the speed of your Internet connection, the download may take a little while. Please be patient and wait for it to complete.
What happens next depends on the browser you are using. For example, if you are using Chrome on a PC, you may see something like this in the lower left corner of your browser window:
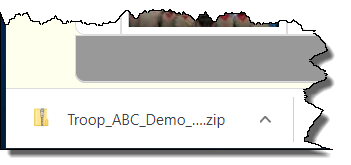
Follow the steps appropriate to your browser to save the zip file to the desired location, then extract the files from there.
Delete Photos
So you just uploaded 150 photos from your last banquet and discovered that not all of them are "keepers"? Don't worry, there is an easy way to get rid of the photos you no longer want.
Select Delete Photos from the Photo Gallery menu to delete multiple photos from an event in one operation.
This function is only available to your Site Administrator and users who have a User Role authorized for the Delete Multiple Photos task.
This page only displays events that have photos. To begin deleting the photos for an event, select the Event and click View Photos.
This will display a list of the photos for this event, as shown below.
Click on the checkbox next to each photo you wish to delete.
Note that you can click in the checkbox in the header row to select all rows. Click there again to clear all of the rows.
When you have selected all of the photos you wish to delete, click on Delete Selected Rows.
The system will display a pop-up message to confirm that you wish to delete these items.
If you click OK the system will proceed with the deletion.
Click Exit to return to the list of events with photos.
Create Video Links
YouTube™ makes it easy to share videos that you've uploaded to their site.
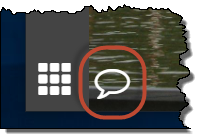
Once you've added your video to YouTube, right click on the video player to bring up an options list.
From this list, select the "Copy embed html" item, which is circled in red on the image at right.
This will copy the html necessary to embed the video. When you paste this text, it should resemble the following:
<iframe width="640" height="360" src="http://www.youtube.com/embed/00000000000?feature=player_detailpage" frameborder="0" allowfullscreen></iframe>
Select Create Video Links from the Photo Gallery menu to add this video to your Video Gallery.
Videos must be associated with an event. Select your Event and click Upload Photos.
You should see a page like the one shown at right.
Click Add a New Item to create a link to your YouTube video.
Write a brief description of this video in the Caption box. This will be displayed in the Video Gallery.
Paste the text from the YouTube Embed HTML (as described above) into the Video Html Link box.
You can use the Sequence Number to change the order in which the videos for this event are displayed in the Video Gallery.
Click Save & Add Another to save this video and begin adding another one.
Control Public Access To Photos and Videos
By default the Photo Gallery is available to the public without logging on. This allows you to give prospective new members a better idea of the exciting activities your troop offers.
Some parents are not comfortable with this approach, and would prefer to keep the photo and video galleries private.
You'll need to do two things to remove your photos from public access:
- Use the Override Public Access page to eliminate public access to the Photo Gallery pages.
- Update the settings on the Photo Gallery Preview widget on your home page to eliminate public access.
You can always restore public access later by reversing these changes.
Public Pages - Frequently Asked Questions
 Our group isn't comfortable having the photo gallery
available to the public. Can we make it private?
Our group isn't comfortable having the photo gallery
available to the public. Can we make it private?
Yes. While many groups like the idea of promoting their organization by showing photos and videos of recent activities, we understand that you may have privacy concerns.
If you want to remove the photo and video galleries from your public website, please follow the instructions in the Control Public Access page of this User Guide.
Our group just subscribed to OurGroupOnline. When I tried to upload photos I couldn't see a way to do it. What am I missing?
Photos and videos must be associated with an event that occurred in the past (we figure you can't take pictures of something that hasn't happened yet, right?). When you purchase your site there are no events loaded, so there's nothing to link to.
If you add an event that occurred in the past, you should be able to upload photos for it.
I created a hyperlink on my Home page and now the bottom half of the page disappeared. What happened?
It is quite possible that you left out a < or > character on one of your tags, or you inserted one two many. Or perhaps you left out a quotation mark at the end of a URL.
Please read through all of the HTML Coding Rules at the bottom of our page on Creating Hyperlinks.
Then please contact us at CustomerSupport@OurGroupOnline.com for assistance in resolving the problem.
In the future, you may want to test out your hyperlink in an HTML editor, like Dreamweaver or FrontPage, before adding it to your website.
Why is the Our Leaders page empty?
The first step is to make sure all of your leaders are entered into the Active Members section of the group database.
Assuming you've already done that, the problem may be that you haven't entered their leadership records. Go to Membership ? Leadership and click Add A New Item to get started.
If you've done all that and the Our Leaders page is still empty, go back to the Leadershippage and make sure that at least some of the leadership records have not expired. The End Date on at least some of the records must be either blank or in the future.